Recording Video Assignments with Zoom
Access Zoom
- Visit uqz.zoom.us/download (for UQ machines please follow the Self-install Guide).
- Under Zoom Client for Meetings, click on the Download button to download the Zoom Installer file.
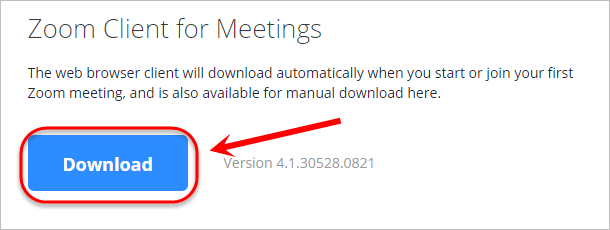
- Run the downloaded file to automatically install Zoom on your laptop device.
- Zoom should open automatically once installation is complete.
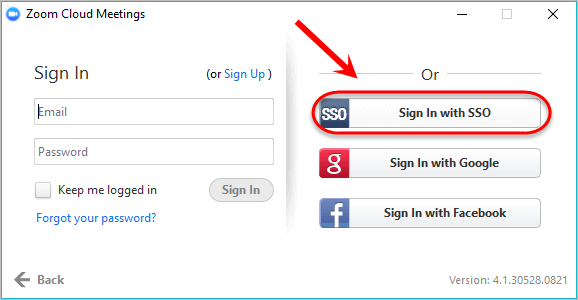
- Click on the Sign In with SSO button.
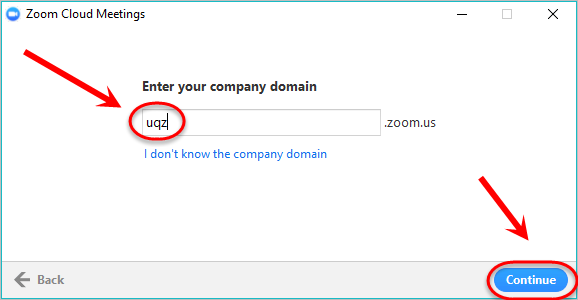
- In the text-field, enter uqz.
- Click on the Continue button.
- A webpage will launch and a pop-up window will appear.
- Click on the Open Zoom Meetings button.

- Enter your UQ username and password.
- Click on the Login button.
Check Zoom settings
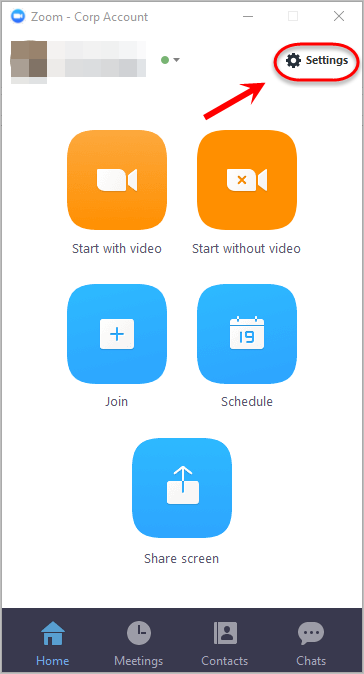
Click on the Settings button.
Check Audio and Video Settings
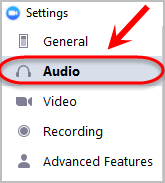
- Click on the Audio tab in the menu.
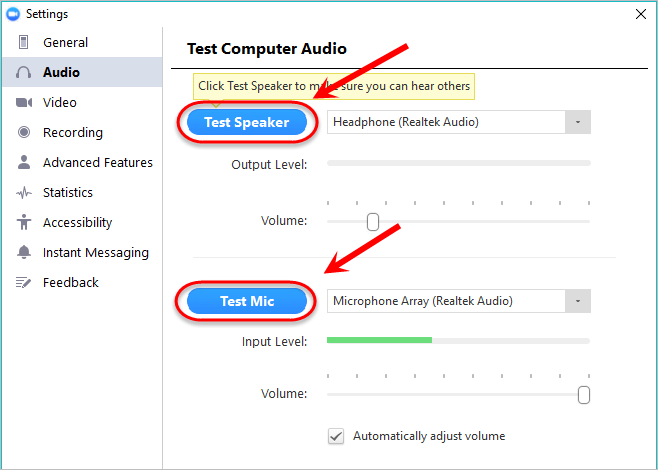
- Click on the Test Speaker and Test Mic buttons to test your audio.
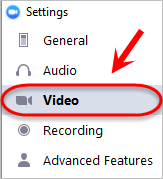
- Click on the Video tab in the menu.
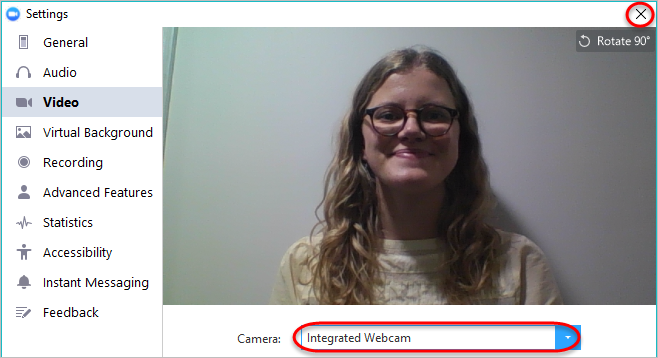
- Click on the Camera dropdown menu to select your desired video source.
- Once you have finished checking the audio and video settings, close the Settings window.
Optionally Enable Virtual Backgrounds
In the General tab, click on the Enable Advanced Features link.
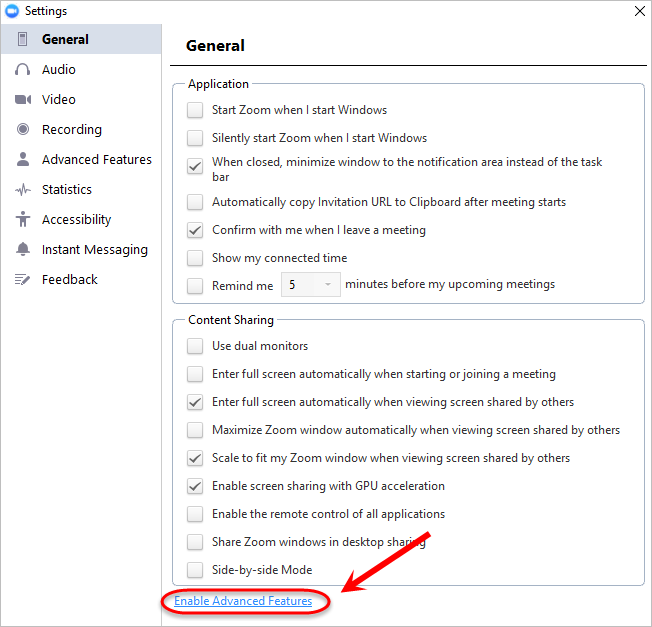
- A webpage will launch with your Advanced Feature settings.
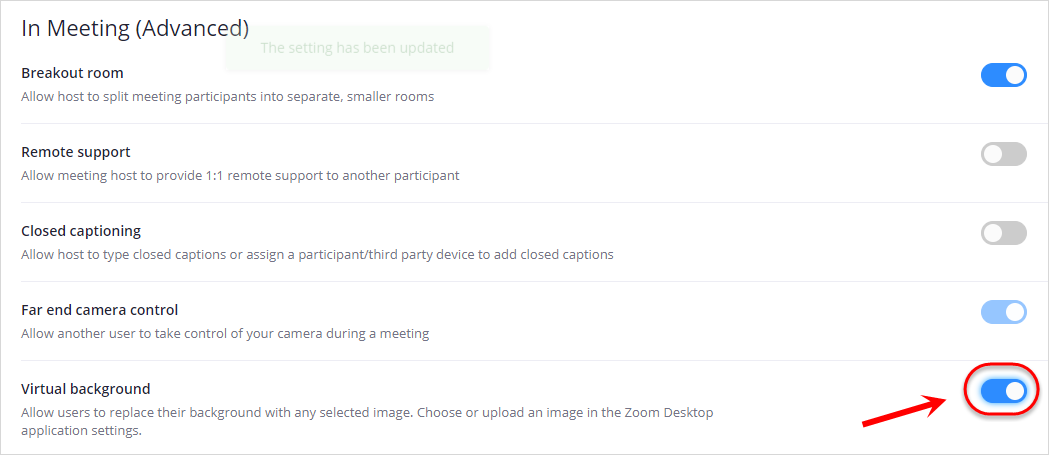
- Turn on the Virtual background setting under the In Meeting (Advanced) heading.
- Close the webpage and navigate back to Zoom.
Launch a Zoom session
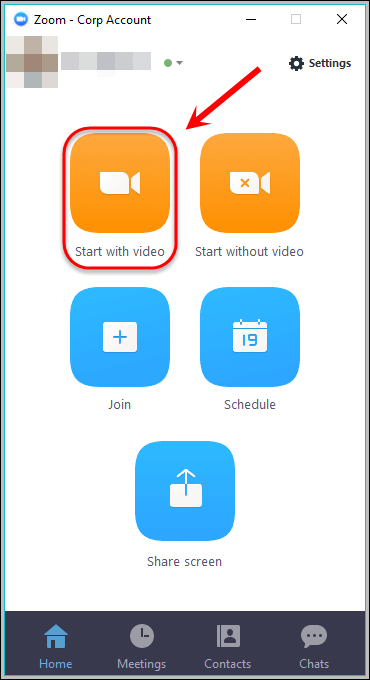
Click on the Start with video button to launch a Zoom meeting.
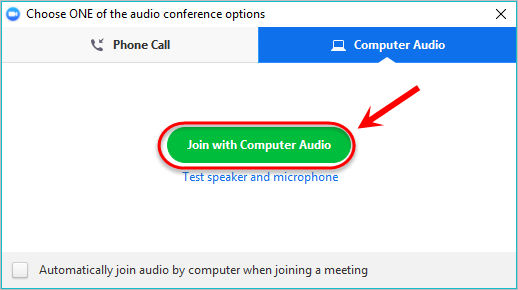
- A pop-up window will appear with audio conference options.
- Click on the Join with Computer Audio button.
Optionally Add a Virtual Background
images
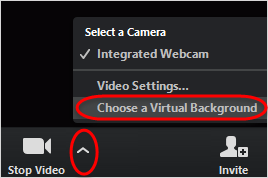
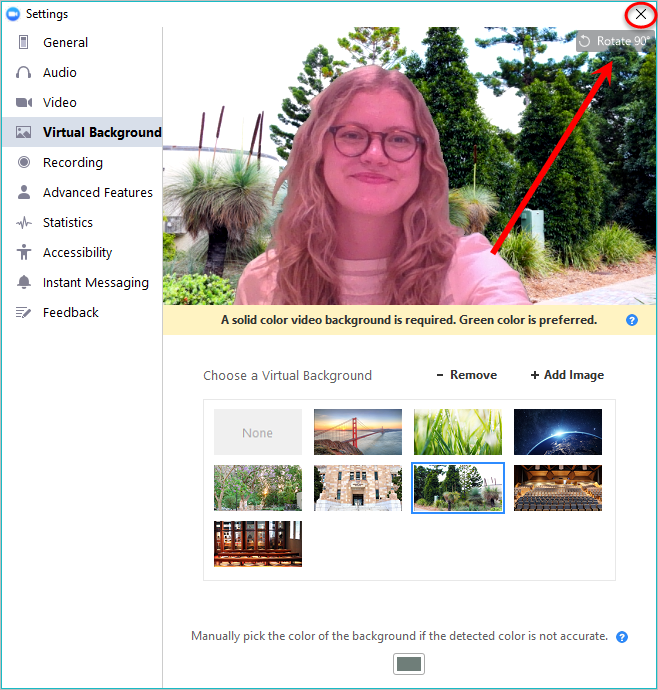
- Click on the Choose a Virtual Background option to launch the settings menu.
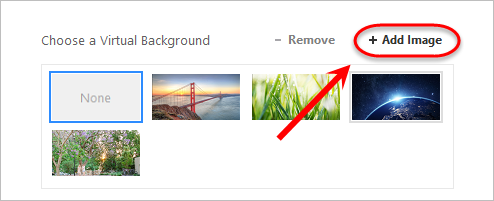
- Click on the Add Image button.
Note: Refer to the Virtual Background Information section below for a range of backgrounds.
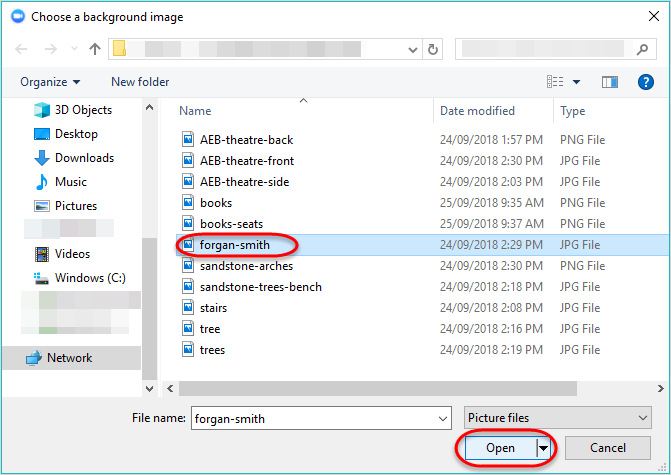
- Choose an image for your virtual background,.
- Click on the Open button to choose your selected background.
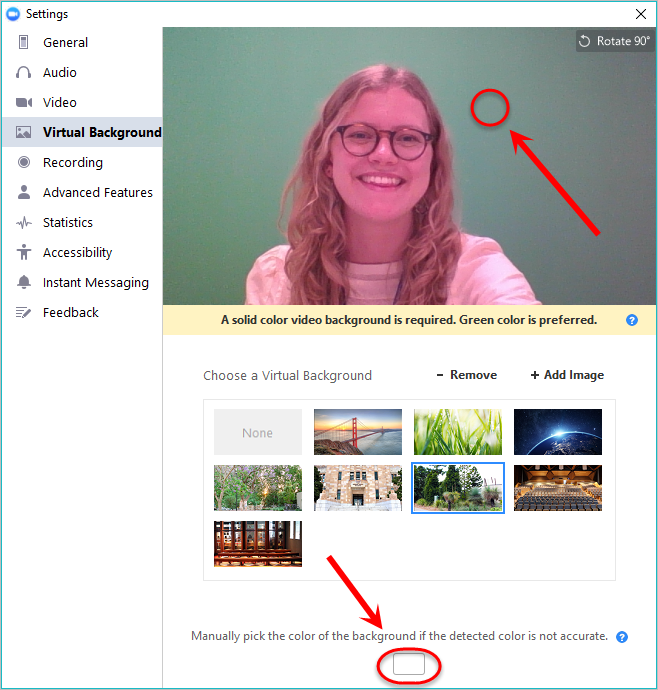
- Select your desired background by clicking on the image.
- Click on the colour picker box to activate the tool.
- Click anywhere on the green screen to select the background colour to be replaced with your chosen image.
- Your virtual background will automatically be applied.
- Click on the X button to close the window.
Share your screen or a PowerPoint
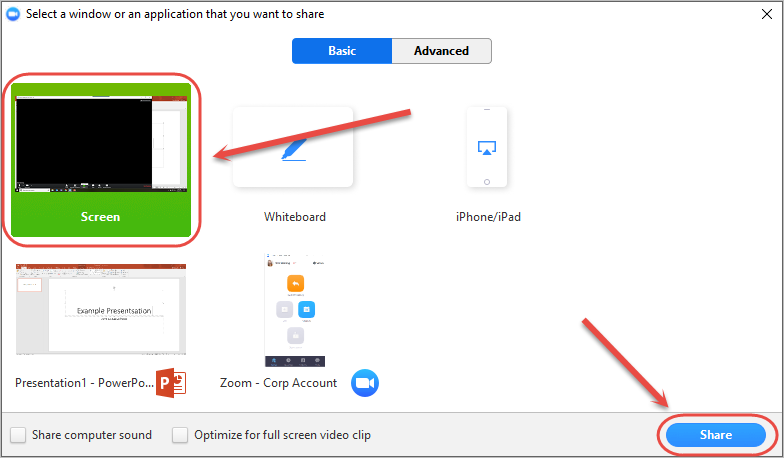
- Click on the Share button.

Share your screen
- Select Screen to share your entire computer screen and any apps you access during the recording.
- Click on the Share button to share your screen.
Share a PowerPoint presentation
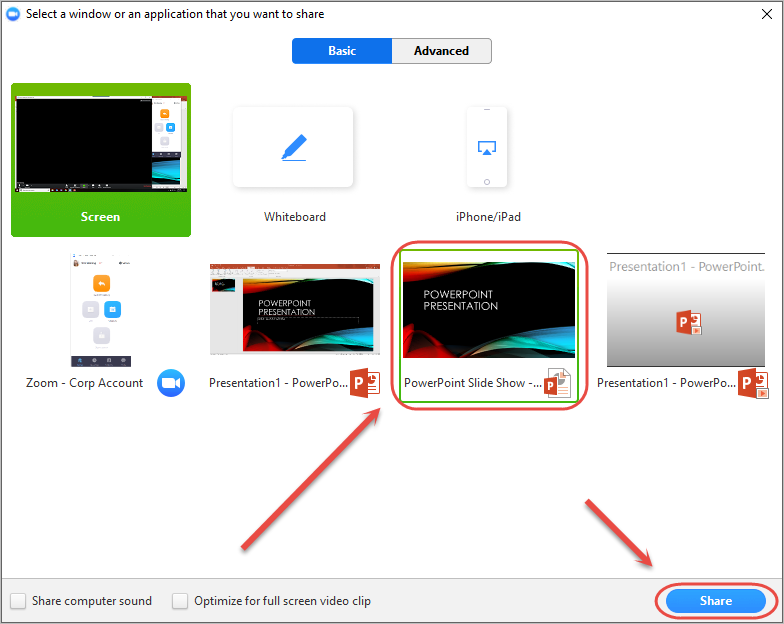
- Open your desired PowerPoint presentation on your computer.
- Ensure your presentation is in Slide Show view and minimise the presentation.
- In Zoom, select your presentation in Slide Show view to share (i.e. not the presenter or normal app view).
- Click on the Share button to share your presentation.
Record your presentation
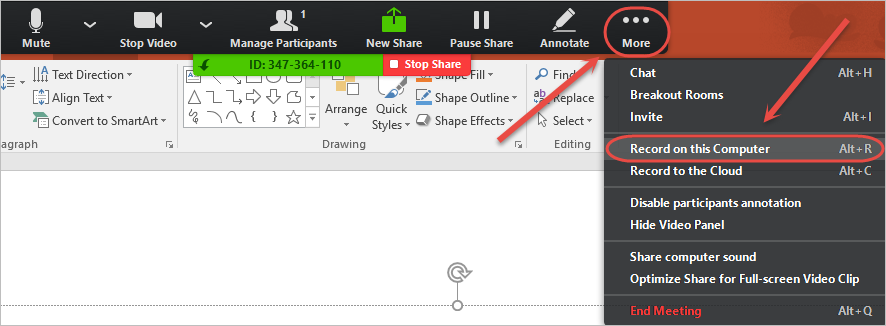
When sharing your screen or PowerPoint
- Click on the Record button.
- Select Record to Computer from the drop-down menu to start the recording.
When sharing only the webcam
- Click on the Record button.
- Select Record to Computer from the drop-down menu to start the recording.

Pause and resume the recording
- Click on the Pause button, to pause the recording throughout the meeting.
- Click on the button again to resume the recording.

Save the recording
- Once you have finished the recording, click on the Stop button.

- Click on the End Meeting button to end the session.

- Once the video file has finished converting, it will be saved automatically as a MP4 file on your computer within C:\Users\uqabcde\Documents\zoom in an individual folder.
Submit or Contribute Your Video
For information on submitting an MP4 file to a Blackboard assignment or the Course Gallery, refer to the Submit a video or audio assignment or guide.
You may also be instructed to copy the Zoom recording link and password into the text editor to submit your video assignent.


